Showing posts with label Bread. Show all posts

Wednesday, April 7, 2010

What I made for Easter...

I, unfortunately, had to work on Easter.  So, the night before I made a couple things for my husband to take to my grandparents' house.  He even got there early to help Grandma get everything ready... isn't that nice?

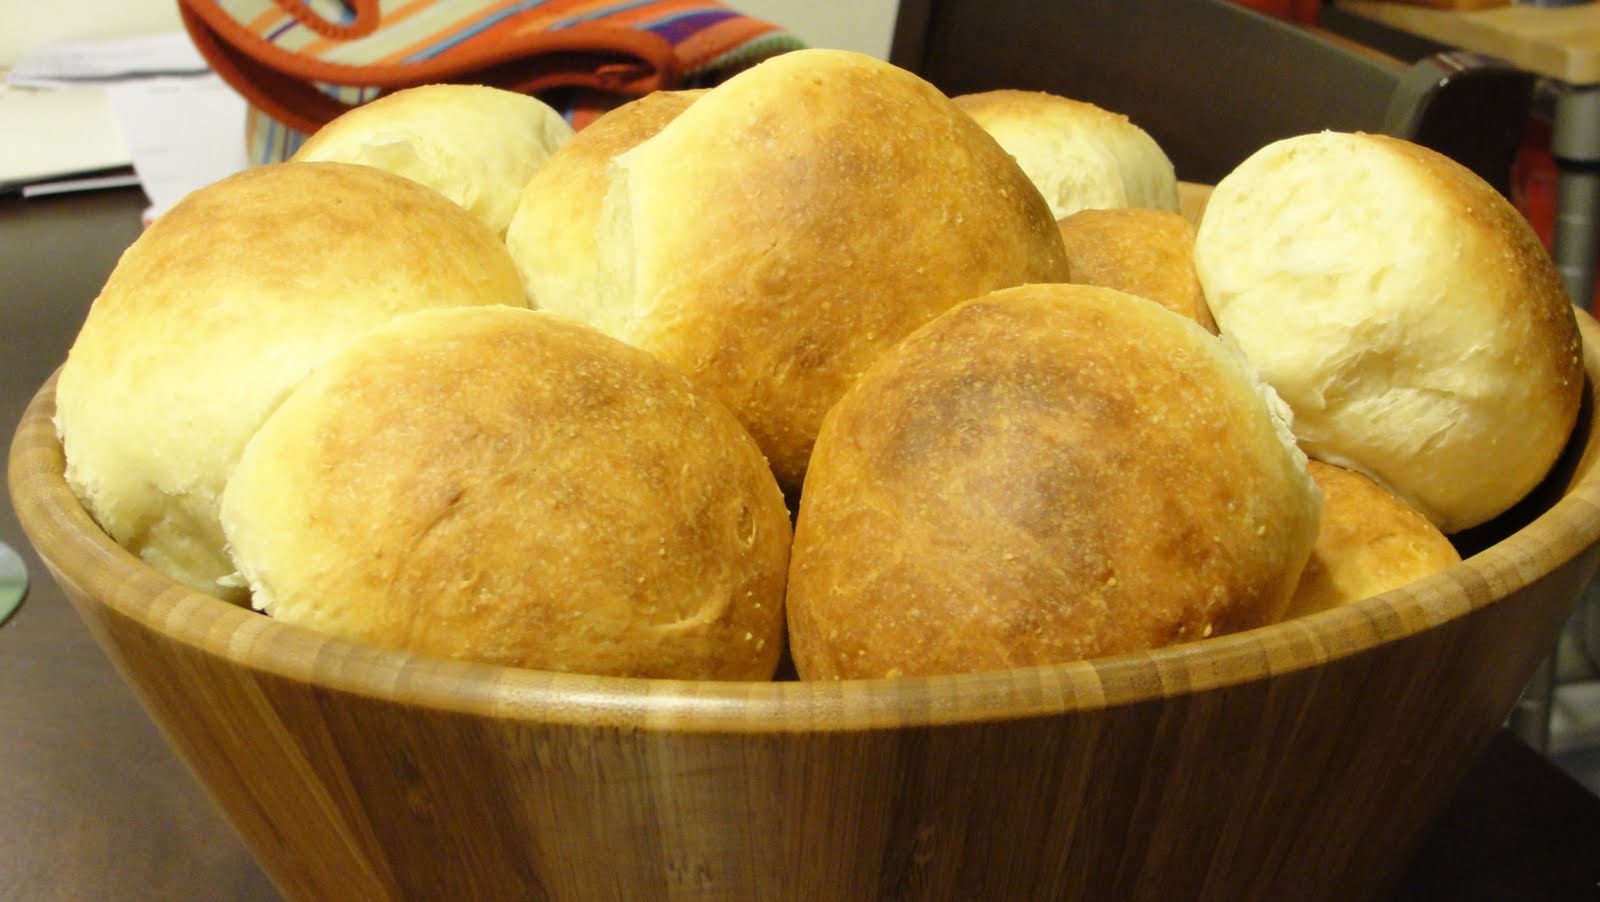
Anyway,  I decided I was going to make a carrot cake and homemade buns.  I'll post the recipes sometime later (the carrot cake recipe needs some tweaking.  It's not quite the texture I wanted, yet).  ...The buns were absolutely amazing!!!  They were like buttery little pillows of deliciousness. 


Here's some photos!

Almost ready to take out of the oven...you should have smelled these!

Piyush and I had to sneak one fresh out of the oven to share...That's when they're the best!

Mmmmmm....

All ready for Easter dinner

Just a really quick decorating job on the carrot cake using homemade cream cheese frosting.

A really yummy carrot!

My grandpa liked the cake so much he had 3 pieces and thanked me for making "real food" and not "that healthy crap."

I hope everyone had a wonderful Easter!

Friday, March 26, 2010

Whole Wheat Bagels


I'm not really much of a bread eater, and neither is my husband BUT I love to bake bread.  I also love challenges.  The other day, after a LONG sabbatical from all things baking (I just haven't really felt like it.  There's been a lot going on and I just ignored all things culinary), I decided it was time to try something new.  

I could have baked bread, sure...but I've already done that before.  I needed something more.  After flipping through a few books I had, I decided on bagels! 

I decided to make plain whole wheat, just to see if they turned out.  I also sprinkled a few sesame seeds on top (which I might skip next time.  They smell funny and taste weird when you toast the bagel).

 The Recipe:
  • 3.5 cup bread flour
  • 3.5 cup whole wheat flour
  • 2.25 cup water
  • 1 Tbsp salt (you can change this to your taste)
  • 3g instant yeast (3/4 tsp.)
The Method:

1) Grab your KitchenAid (or a large mixing bowl), and mix all the ingredients together, usually I add all the dry ingredients (minus the salt), then the water.  After I mix together a little I add the salt.  I'm always nervous about messing up the yeast.  Mix on first speed for a few minutes.  The dough should be pretty stiff and should not feel sticky to the touch.  Mix for 3 more minutes (usually I do this part by hand.  I love to knead!).

 When you're done kneading the dough should be very strong.

2) Cover the dough with a towel and let rise for 1 hour.  This dough won't really double in volume, infact you may not see much rise at all.  Regardless, you need to let the dough rest.

3) Divide the dough into 14 (or more) equal portions.  I used my food scale and measured out 3.5 oz.  It's important to keep your dough covered while doing this.  You don't want the outside to dry out and get a little crust on it.

4) Form your bagels.  This isn't as hard as it seems, and unfortunately I didn't take photos.  There are 2 ways.  You could form a ball and poke a hole in the center with your thumb.  Just make sure your hole is big enough.  Or you could roll your dough into a "snake", combine the two ends and join them together.  This is what I did.

5) Place the finished bagels onto a sheet pan covered with parchment paper.  Leave about an inch in between, and cover well with plastic wrap.  You could toss them in the fridge for overnight (or about 8 hours), or you could let rise outside the fridge for about 40 minutes.

6) You won't really notice much rise with the bagels when you bring them out of the fridge, although they might feel a little "springy."  Preheat your oven to 500* and start a pot of boiling water on your range.

7) Time to boil!  Put 3 bagels in the pot, you don't want to crowd them.  Move them around a little, and let boil about 1 minute, each side.  Toss them in a bowl of ice water to stop the cooking.  Let them hang out in there for a couple minutes.  Remove them and put them on a cookie sheet lined with parchment paper.  Decide which side you want to be the top.  Sprinkle that side with seeds (if you want) and then flip it over so the seeds are on the bottom.

 8) Once all the bagels are done, toss them in the oven.  Let them cook for about 5 minutes and then flip them over.  Now the seeds will be on top.  Let them cook another 12 minutes or until they are nice and brown.  Remove from the oven and let cool about 20 minutes.

Eat and Enjoy!!!  They are YUMMY!!!

I like this recipe because I made them myself and I know what ingredients are in them.  There's no weird chemicals and they really taste better than anything you'd get in the grocery store!

 Give them a try!!!

Wednesday, December 16, 2009

Eggs Benedict

I decided the other day that I was going to learn to poach an egg. I never thought that I'd ever try this, but Piyush loves them, so sometimes I decide to surprise him. Before I met him I thought that only old men ate poached eggs. They just seemed so yucky. Not to say that only old men eat yucky things, I guess that's just who I associated them with.

Anyway, before I put my foot in my mouth any further...

I did a little research first. I saw that some people use a big pot and fill it with water. They let the water simmer, then using a spoon they swirl the water around and crack the egg in the water. This allows the egg to spin around in the water and causes the egg white to fold over the yolk. Sounds like a pretty good idea. I tried one, and it worked, but I lost quite a lot of the egg white. It wasn't even that I lost a lot of the egg white, because it turned out okay...see:


I mostly didn't like that they looked kinda weird.  There were whites sagging all over the place.  Maybe I just haven't got the hang of it yet, I'm not sure.  I just knew this wasn't going to be the right method for me.

So I turned to an old friend, a book that I know won't fail me. It's a little hard to read sometimes and you really have to understand the method before you attempt the recipe. But, Julia Child, Louisette Bertholle, and Simone Beck haven't let me down yet and Mastering the Art of French Cooking is the book I go to when I just can't figure something out.

I read the directions, grabbed a 2 inch deep fry pan and filled it up with water. I let it heat until it started to simmer and then I cracked an egg as close to the water as I could. Using a wooden spoon I gently scooped the egg white over the yolk a few times. Then I just left it alone for a couple minutes. Using a slotted spoon I turned it, and left it on it's other side for about 2 more minutes. I don't know that you really have to do this, I just wanted to make sure it cooked through correctly. After about 4 minutes it should be done!

Meanwhile I had cut a couple circles out of a loaf of homemade brioche bread. It's a real buttery, sweet bread. It's so delicious! I use the technique found in Artisan Bread in 5 Minutes a Day. This book is amazing, and the bread tastes so good. You should try it!


This is a loaf of white Brioche, for the eggs benedict, I used wheat, but I didn't take pictures, sorry!

I took the circles I cut and fried them in a little butter to toast them up and give them a nice crust.

I didn't have any canadian bacon on hand, but I did have soy sausage, so I put that on top of the little brioche circles, topped with my beautiful poached eggs and then drowned them in homemade hollandaise sauce. I think I'll save the hollandaise sauce for another post though. It really wasn't hard to make, it was just really time consuming. I guess you can make it in a food processor or a blender too, but Julia says you lose flavor. I don't know. I've never tasted the stuff before, but I wanted to impress my hubby...so I did it the old fashioned way.  It involves a lot of butter...I used 1 1/2 sticks plus 2 tbsp. cold butter to keep the sauce from curdling and to stop the cooking, 3 egg yolks, some lemon juice, salt and pepper---so the ingredients are way easy.

He loved it! And I think it looked pretty!